

Why Edge Banding Problems Matter in Furniture Manufacturing
Edge banding is not simply a finishing step. A weak, uneven or damaged edge can create rework, interrupt panel flow and reduce the perceived quality of cabinets, wardrobes and other furniture parts. The good news is that most edge banding defects can be traced to a manageable group of variables: board-edge preparation, adhesive condition, temperature at application, pressure, feed speed, or trimming and finishing alignment.
PVC, ABS, acrylic and veneer edgebands need compatible adhesive and repeatable settings. When a defect appears, the most effective response is not to adjust every setting at once. Start with the visible symptom, verify one process variable at the machine, and run a test panel before returning to production.
How to Use This Edge Bander Troubleshooting Guide
- Identify the defect that is visible on the finished panel.
- Check the likely causes in the order listed, beginning with material condition and glue application.
- Change one setting at a time and confirm the result on a test panel.
- If the same defect continues across different materials, inspect machine calibration and worn components.
1. Edge Banding Peeling or Lifting
Peeling or lifting is one of the most common edge banding problems. It may appear immediately after processing or only after the panel cools and is handled.
The usual causes are adhesive that is too cold at the application point, cold boards or tape, insufficient roller pressure, dusty or damaged board edges, or an unstable feed speed. A glue-pot display may look correct while the adhesive temperature at the application roller is outside the intended processing range.
Start by checking the actual application condition, not only the display setting. Clean and pre-mill the board edge where needed, condition cold panels and edgeband material, and make sure the pressure rollers close the joint evenly. Confirm that the adhesive, board and tape are compatible, then use a test panel to fine-tune feed speed and pressure.
2. Visible Glue Lines or Glue Residue
A visible glue line can make an otherwise sound panel look unfinished. It is often caused by excess or uneven adhesive, inadequate pressure, an uneven board edge, poor glue-roller positioning, or a glue colour that contrasts with the panel and tape.
Do not assume that adding more adhesive will solve the problem. First inspect glue coverage, roller position and joint closure. Reduce excess application where necessary, clean the glue-joint scraper, and verify that the pressure rollers are applying even contact across the full edge. For high-visibility furniture parts, approve a finished sample under the lighting conditions where the product will be used.
3. Poor Adhesion, Gaps or Glue Starvation
Poor edge banding adhesion may show up as small gaps, a discontinuous glue film or a band that can be pulled away by hand. Common causes include a clogged nozzle or application port, insufficient glue transfer, an incompatible adhesive, contaminated materials, or a feed speed that does not match the adhesive's open time.
Purge and clean the glue application area, then verify that glue transfers continuously to the board edge. Confirm that the selected adhesive is suitable for the tape and substrate, and follow the adhesive supplier's technical data sheet for its operating window. Adjust speed only after basic glue coverage and material compatibility have been confirmed.
4. Edge Band Colour Mismatch
Colour mismatch usually comes from mixed tape batches, a finish or gloss level that does not match the panel, or a tape selected without checking the final lighting environment. It can be especially noticeable on kitchen cabinets, wardrobe doors and high-gloss furniture components.
Approve a panel-and-edgeband sample from the same production batch before the production run. Record the tape code, thickness and finish with the job settings. This simple control reduces the risk of mixing similar-looking materials that differ once they are assembled or viewed under brighter light.
5. Edge Banding Bubbles or Delamination
Bubbles, air pockets and delamination can indicate moisture or contamination in the substrate, interrupted glue coverage, rapid cooling, or insufficient pressure. They can also appear when materials have not been conditioned to the workshop environment.
Check panel storage and material condition first. Inspect the board edge and glue film, confirm that the pressure rollers make full contact, and run a short test after restoring stable conditions. If bubbling continues, stop changing machine settings at random and verify the adhesive and material combination with the relevant supplier guidance.
6. Rough Trimming Marks or Deep Profile Scratches
Rough trimming, deep scratches and tool marks are usually mechanical finishing defects rather than adhesive problems. Worn cutters, incorrect trimming depth, misaligned top and bottom trimmers, or damaged guide shoes can leave a poor edge surface even when bonding is strong.
Inspect cutter condition and reset trimming depth before changing glue settings. Verify guide-shoe contact on a test panel and replace worn tools. Keeping the pre-milling and trimming units aligned also helps create a cleaner board edge for the glue joint and reduces the amount of finishing work required later.
7. End Trimming Breakouts or Corner Snaps
End trimming breakouts and corner snaps can occur when the end-trim saw is dull, blade timing is inaccurate, tape overhang is excessive, or the tape is cold and brittle. A chipped or uneven panel edge can make the defect worse.
Check saw sharpness and sensor timing, then reduce unnecessary overhang. Condition cold materials before processing and inspect the incoming panel edge. Test the current feed rate before increasing throughput, particularly when changing tape thickness or board material.
8. Tape Feed Slip, Drift or Corner Offset
When the tape slips, drifts or arrives offset at the corner, the cause is often dust on feed belts or tracks, worn guides, unsuitable pneumatic pressure, or tape that is not tracking straight. Incorrect tape width or thickness can also create instability during feeding.
Clean the feed path, pressure rollers and guide area. Inspect guides for wear and adjust pressure so the tape is held securely without leaving marks. Confirm that the tape specification matches the panel and the programmed job before starting a large batch.
9. Scraper Chatter, Wavy Edges or Stress Marks
Scraper chatter and wavy edges may come from feed speed and cutter RPM that are not matched, aggressive scraper removal, machine vibration, or unstable panel hold-down. Stress marks can also appear when the material is cold or when too much material is removed during finishing.
Check top-pressure stability and machine vibration first. Synchronise feed rate with cutter speed, reset scraper removal to the minimum needed, and inspect the result on a test part. Small, controlled changes are more effective than over-correcting several units at once.
10. Buffing Smears and Recurring Production Slowdowns
Buffing smears are commonly caused by residue on buffing wheels, dirty pads, accumulated glue, or poorly controlled finishing conditions. When these problems occur alongside repeated downtime, the underlying issue may be a weak cleaning routine, frequent manual resets, or worn mechanical components creating defects upstream.
Clean pads, rollers, glue residue and sensors on a defined maintenance schedule. If the same defect persists across different materials after the basic checks, schedule calibration and inspect wear parts instead of repeatedly changing an operator's settings. Stable heating, pressure, tracking, trimming and finishing performance are essential for reliable production efficiency.
How to Choose the Right Edge Banding Machine to Solve These Problems?
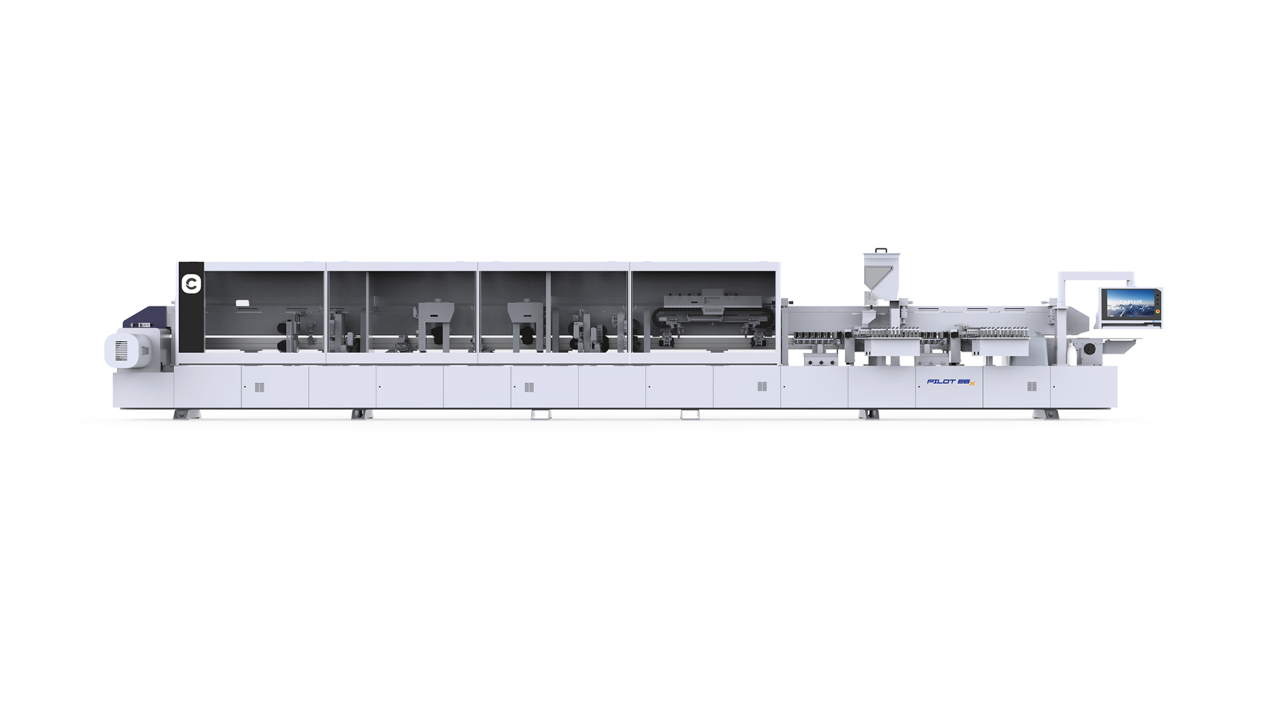
Faced with a complex materials market and stringent quality requirements, choosing a reputable edge banding machine manufacturer is crucial. When evaluating machine, the following dimensions should be considered:
- Does it support seamless switching between multiple materials (PVC/ABS/wood veneer)?
- Does it have a dual glue pot or a quick glue change system to support PUR adhesive?
- Are the temperature control system and edge trimming module controlled by high-precision servo motors?
- Is it perfectly compatible with the logic of automated furniture manufacturing production lines?
In this regard, Caelus provides a solution that sets an industry benchmark. As a leading supplier of intelligent manufacturing machine, Caelus' Edge Bander is specifically designed to address the pain points of modern furniture manufacturing.
The Caelus edge banding machine uses a heavy-duty, high-rigidity frame, fundamentally eliminating the unevenness caused by conveyor vibration. Its high-speed, multi-channel servo edge banding hopper allows for second-level switching between different colors and thicknesses of edge banding tape. More importantly, Caelus machine is perfectly compatible with EVA, PUR, and even laser edge banding processes. Its high-precision front milling module and servo contour tracking system ensure top-quality edge banding with no glue lines, no burrs, and extremely smooth corners.
Troubleshooting Edge Banding Quality with Advanced Machine Features
|
Common Problem |
Root Cause in Traditional Process |
Smart Machine Solution |
|
Peeling Off / Weak Adhesion |
Unstable glue temperature, inadequate manual pressure. |
Closed-loop precision temperature control, servo-driven pneumatic pressure rollers. |
|
Excess Glue Line |
Inaccurate glue application, mismatched feed speed. |
Auto-adjusting glue dosage system synchronized with continuous high-speed track. |
|
Rough Trimming / Corner Imperfection |
Worn cutters, slow mechanical tracking response. |
High-frequency motors, multi-axis servo corner rounding units for instant adaptation. |
|
End Cracking |
Fluctuating cutting force on dense materials. |
Precise linear guide end-trimming with optimized cutting angle and stable force. |
By introducing industrial-grade high-end machine like Caelus, factories can not only completely eliminate the ten quality pain points mentioned above, but also significantly reduce their reliance on skilled operators through its simple digital control panel, achieving truly efficient production.
How to Prevent Recurring Edge Banding Defects
The best way to reduce edge banding problems is to create a repeatable pre-production routine. Before each run, confirm the panel and tape specification, adhesive compatibility, actual application condition, glue coverage, roller contact, feed settings and cutter condition. Record approved settings by board material and tape thickness so that operators can return to a proven baseline.
Daily cleaning is equally important. Remove dust and glue residue from the application area, rollers, guides, scrapers and buffing units. When a defect repeats across several materials, treat it as a signal to inspect heating stability, tracking, pressure rollers or trimming units for calibration and wear.
Future Trends of Edge Banding in Automated Furniture Manufacturing
The furniture factories of the future will no longer be a patchwork of information silos. In the grand blueprint of Automated furniture manufacturing, edge banding is no longer seen as a "last-ditch repair process," but rather a core execution hub connecting the entire intelligent data flow.
Future edge banding machines will be directly and deeply integrated with the front-end Panel Saw and Panel Storage system. When barcode-labeled boards enter the conveyor belt, the scanner on the machine instantly reads the data and automatically presets all parameters, including adjusting the beam height, switching the adhesive formula, and selecting the edge banding color.
Evolution from Traditional to Automated Edge Banding
|
Feature |
Traditional Edge Banding |
Automated Furniture Manufacturing Integration |
|
Data Input |
Manual measurement and dial adjustment. |
Barcode/QR code scanning, direct MES system integration. |
|
Process Setup |
High machine downtime for changing thickness/glue. |
One-click auto-setup via servo motors in seconds. |
|
Quality Control |
Visual inspection after completion (reactive). |
Built-in sensors for real-time glue and pressure monitoring (proactive). |
|
Line Integration |
Standalone machine operation. |
Seamless physical and data linkage with CNC saws and sorting buffers. |
Leveraging this data-driven production management, the factory will achieve truly flexible, unmanned, and continuous production, significantly improving both space efficiency and labor productivity.
Edge Bander Troubleshooting FAQ
Q1. Why is my edge banding not sticking?
A: Start with the board edge, the actual adhesive condition at application, glue coverage and pressure-roller contact. Cold or contaminated materials and unsuitable feed speed can also weaken the bond. Follow the adhesive supplier's technical data sheet for the correct operating window.
Q2. What causes a visible glue line on edge banding?
A: A visible glue line can result from excess adhesive, low pressure, an uneven panel edge, poor glue-roller positioning or a colour mismatch. Check coverage and joint closure before adding more glue.
Q3. How can I prevent edge banding bubbles and trimming defects?
A: Condition panels and tape, keep application and pressure components clean, and inspect cutter sharpness and guide alignment before production. Use a test panel whenever the material, tape thickness or adhesive changes.
Conclusion
The fastest way to solve edge banding problems is to diagnose the visible defect before changing settings at random. Verify the board edge and material condition, confirm adhesive performance at the application point, check pressure and feed stability, and then inspect trimming and finishing units. This approach helps furniture manufacturers reduce rework while protecting edge quality.